Transaxle Mount Installation Instructions
You will need a commonly available tools. The socket and wrench sizes you'll be using are 10mm, 12mm, 14mm, and 17mm. You will also need deepwell sockets and a long extension.
Thoroughly read these instructions and view all illustrations before beginning.
These instructions are available online, with high-res images, at www.deyemeracing.com/St/ST1MTM_install.htm.
Finally, if you need help with the installation, feel free to contact us via e-mail, at Help@DeyemeRacing.com.
CHECKLIST
transaxle mountList any items you need to get here...
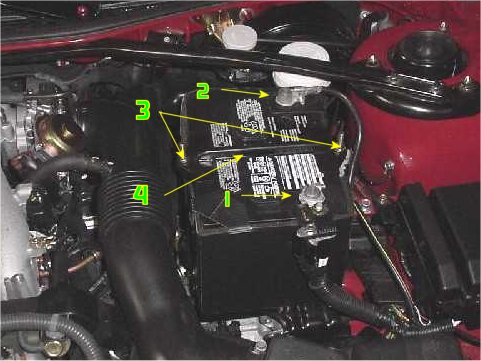
Disconnect the Positive battery cable1.
Disconnect the Negative battery cable2.
Remove the battery hold-down nuts and studs3.
Remove the battery hold-down bracket4.
Remove battery cover5 from battery6.
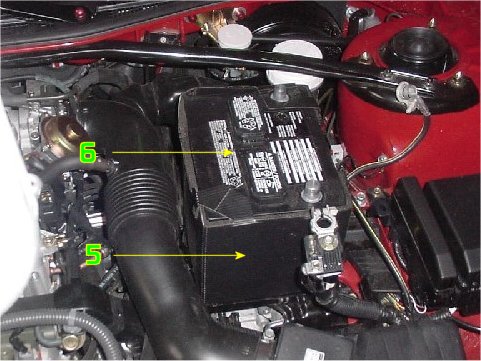
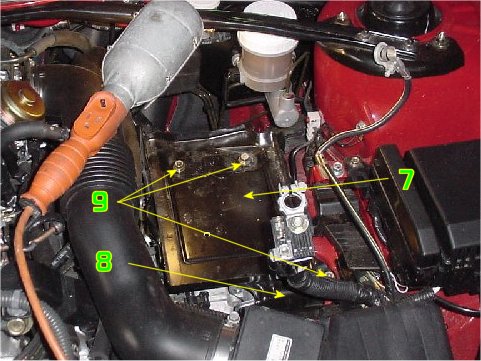
Remove 2 bolts holding wire harness8 to battery tray7.
Remove bolts holding battery tray to chassis9. Remove battery tray7.
Remove bolt holding wire harness to transaxle bellhousing.
Lift wire harness off threaded stud near transaxle mount.
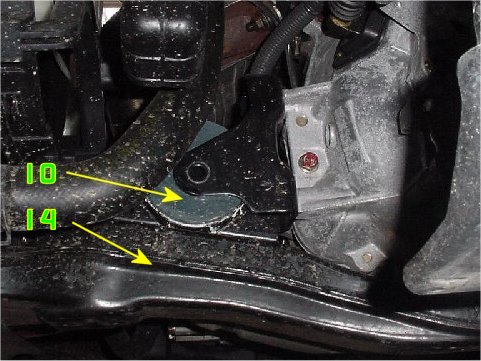
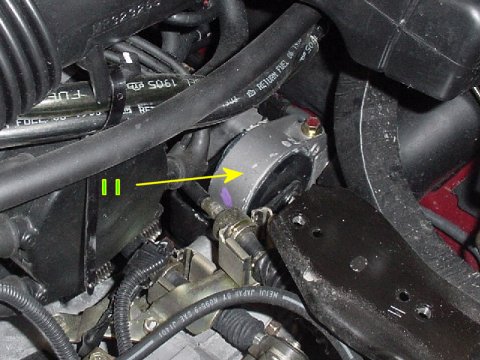
Remove front isolator10 through-bolt and nut.
Lower vehicle.
Remove rear isolator11 through-bolt and nut.
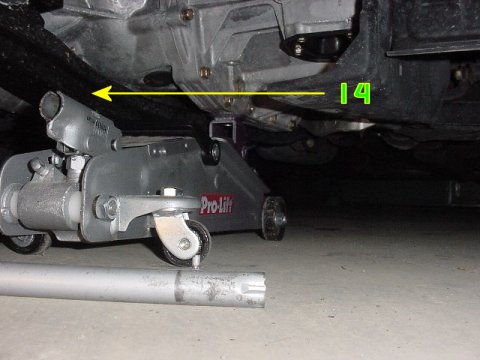
Raise jack just enough to support transaxle.
note:Raise the jack while also watching the vehicle body. When the body begins to move up with the jack, the transaxle is supported.
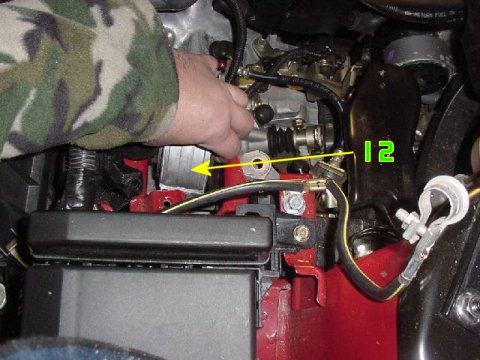
Remove the transaxle mount12 to chassis through-bolt.
Remove the (4) transaxle to transaxle mount studs/nuts13.
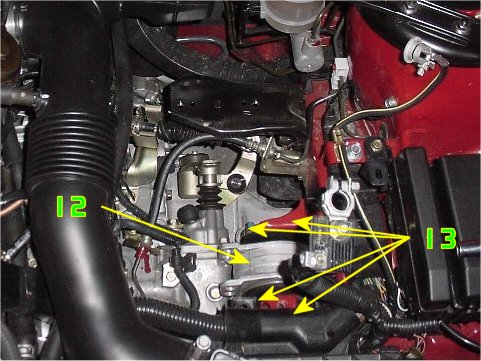
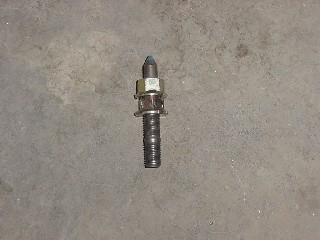
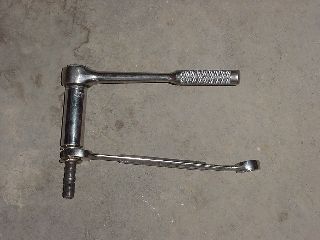
Using a wrench on the buttom nut and a long socket on the top nut (shown removed from vehicle for illustration purposes), turn the bottom nut counterclockwise while holding the top nut so that it does not spin on the stud. Once the stud is loose, you can remove the wrench, and use the socket to finish removing the stud.
Remove the transaxle mount12.
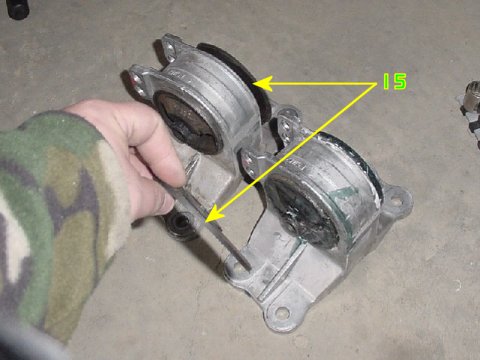
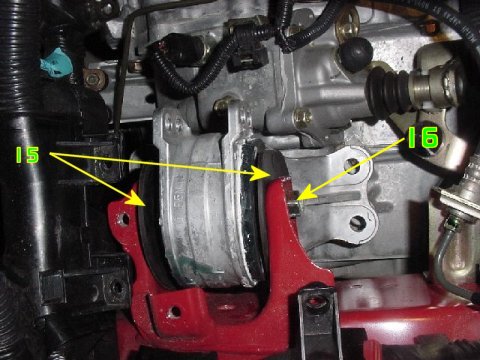
Remove the rubber covers15 from the old mount and press them onto the new mount.
Install the chassis to transaxle mount through-bolt and nut16, but do not torque down.
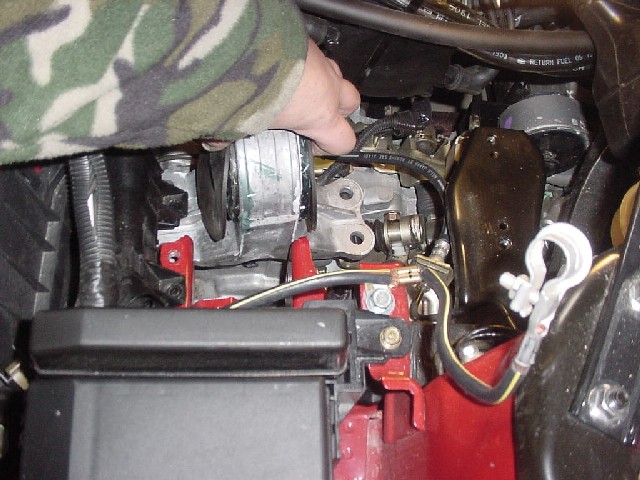
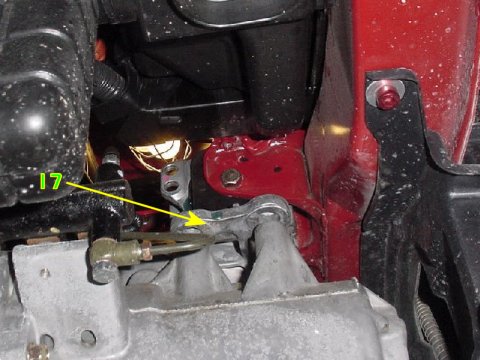
Jack the transaxle up to the level of the mount (watching from underneath, you can see how close the transaxle is to the mount)17.
Place a small amount of Lock-Tite on the studs, and install them into the transaxle, and Torque to 50 ft-lb.
Install the rear isolator through-bolt, but do not torque down.
SLOWLY remove the jack from the transaxle.
Torque transaxle mount through-bolt to 60 ft-lb.
Torque front and rear isolator through-bolts to 34 ft-lb.
Install battery tray and attaching bolts.
Attach wire harness to battery tray.
Install battery, battery cover, and hold-down.
Attach battery power cables.
You're DONE!