
|
The vehicle should be clean and cool.
There should be no unsolved issues with related components prior to installation.
Always diagnose problems before jumping to conclusions.
Thoroughly read the instructions and view the illustrations before beginning. First things first- take inventory. Make sure you have all the tools and components that came with the item you purchased. Last things last- if you need help with the installation, feel free to contact us via e-mail, at help@deyemeracing.com. Fully explain what you're doing, and your question. Include pictures if possible. These instructions are also available online, with images, at www.deyemeracing.com/Project_Mamba/BA1HOODLFT_INSTALL.HTM. |
|||||||
|
Checklist (Hood Spring Kit)
2 Gas-charged lift springs with end fittings4 Mounting Brackets with ball joints 2 M5 screws with well nuts 4 M8 x 20 button head screws Checklist (Trunk Spring Kit)
2 Gas-charged lift springs with end fittingsTools and Supplies (not included)
|
|
||||||
|
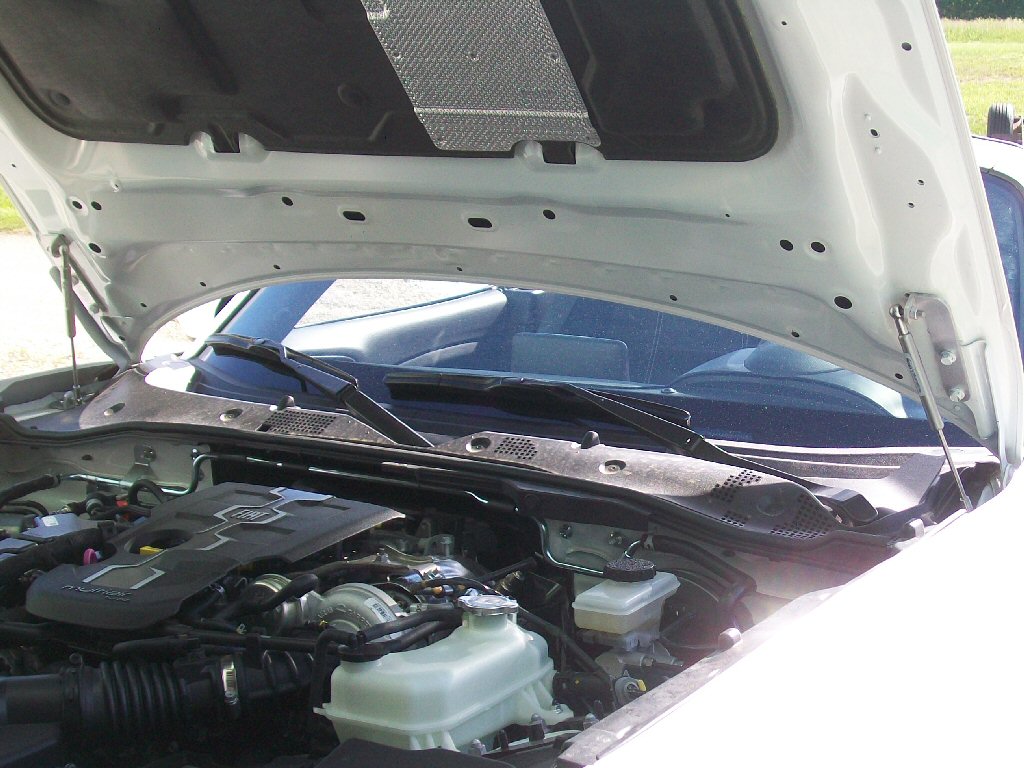
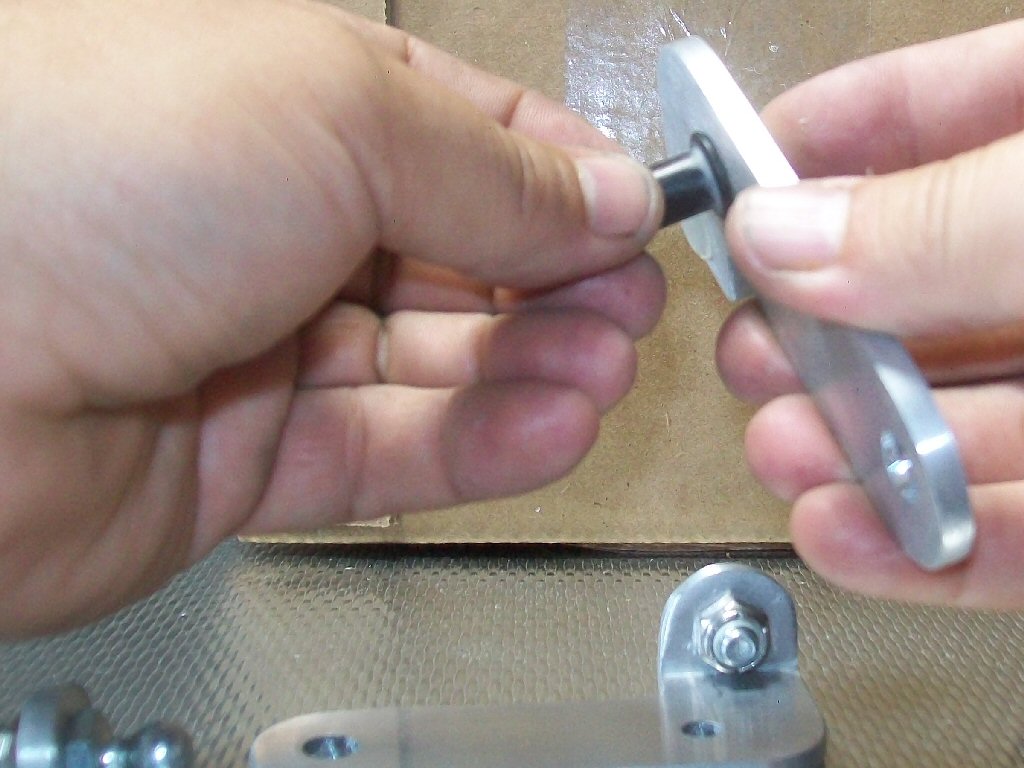
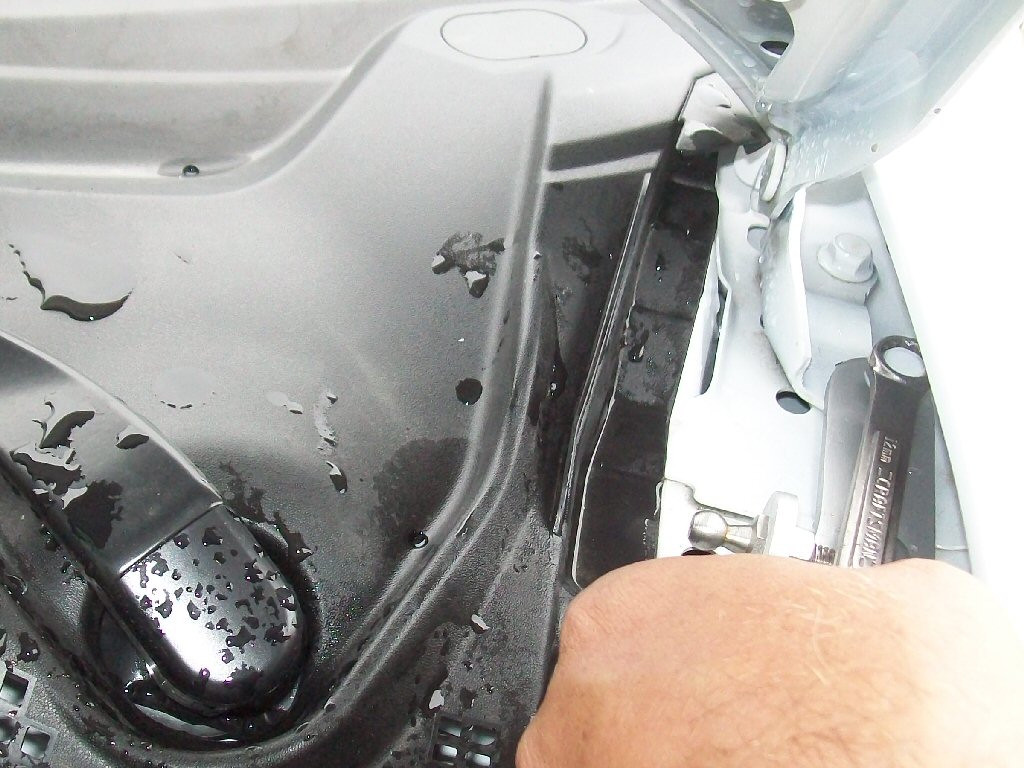
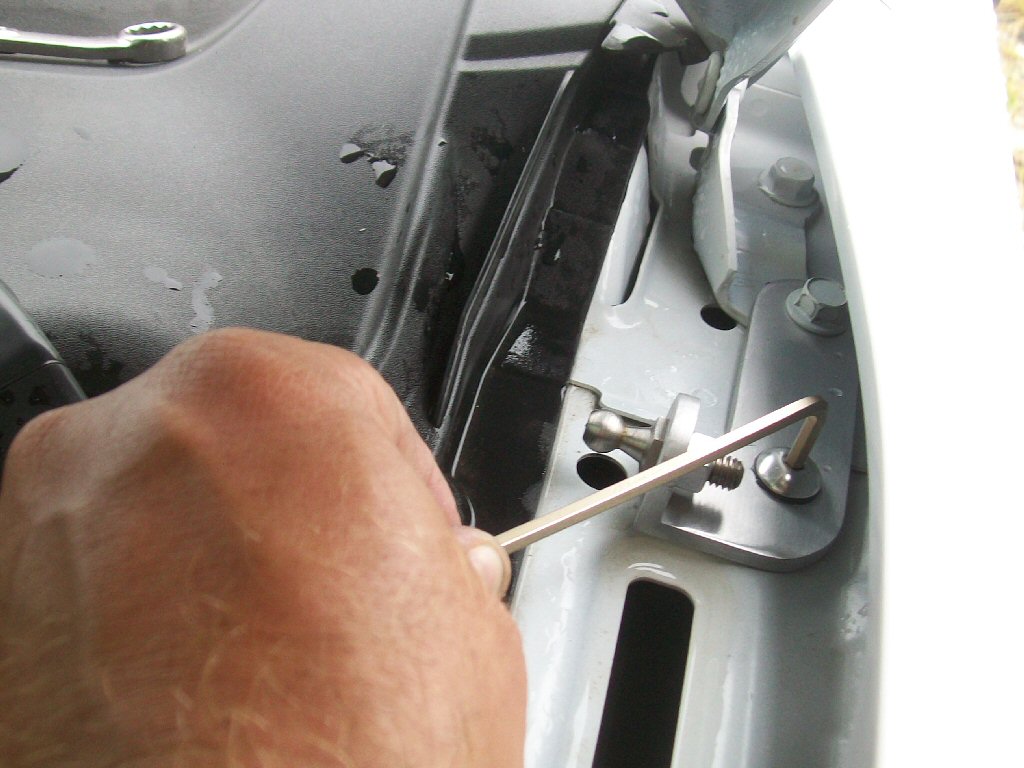
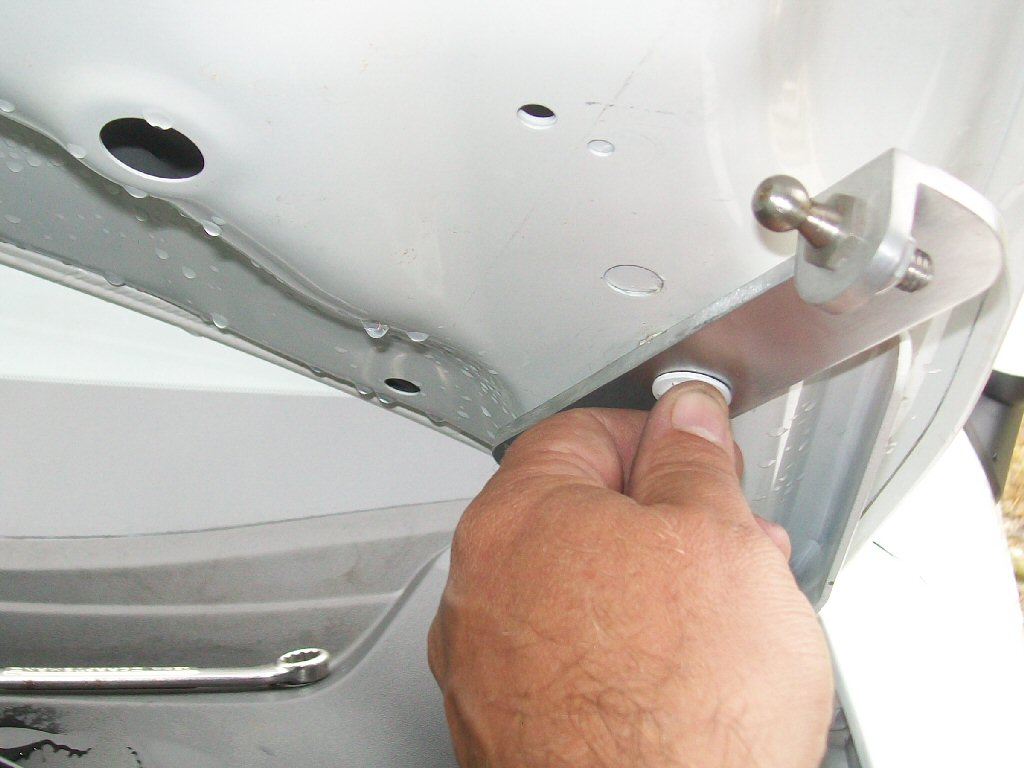
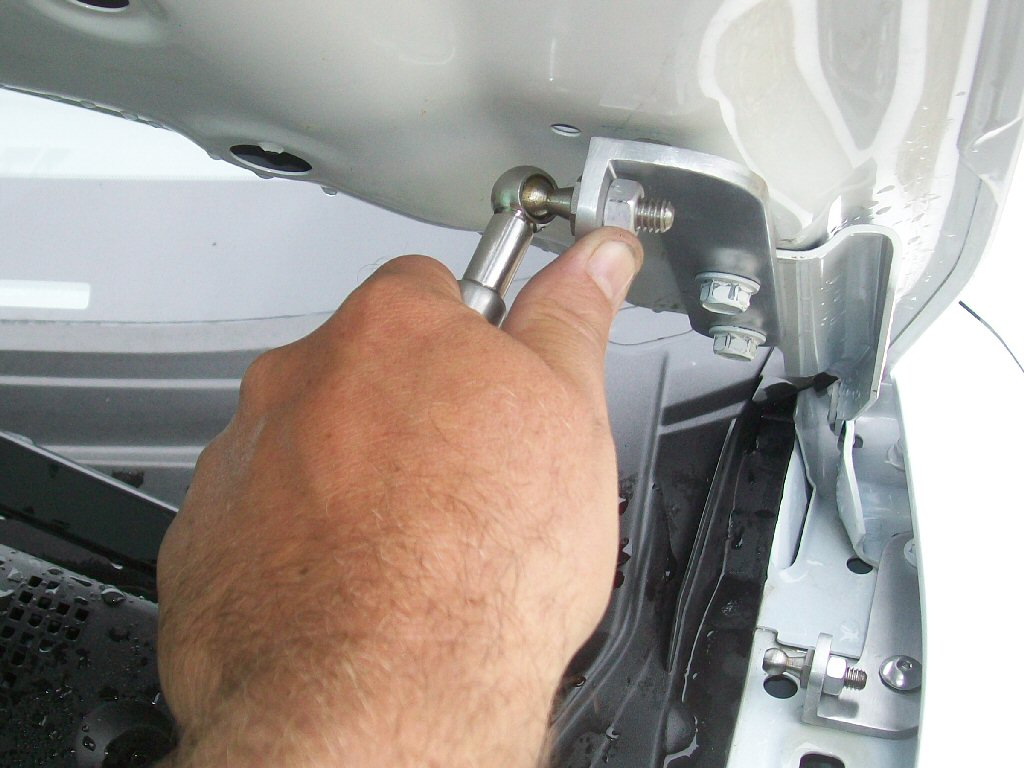
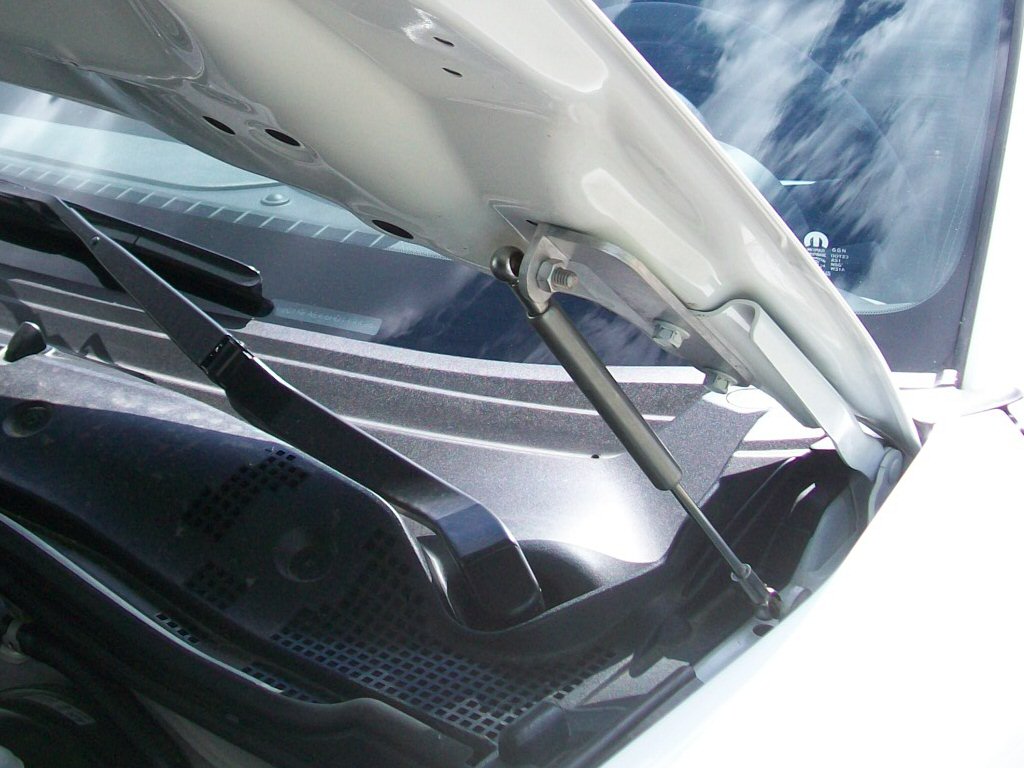
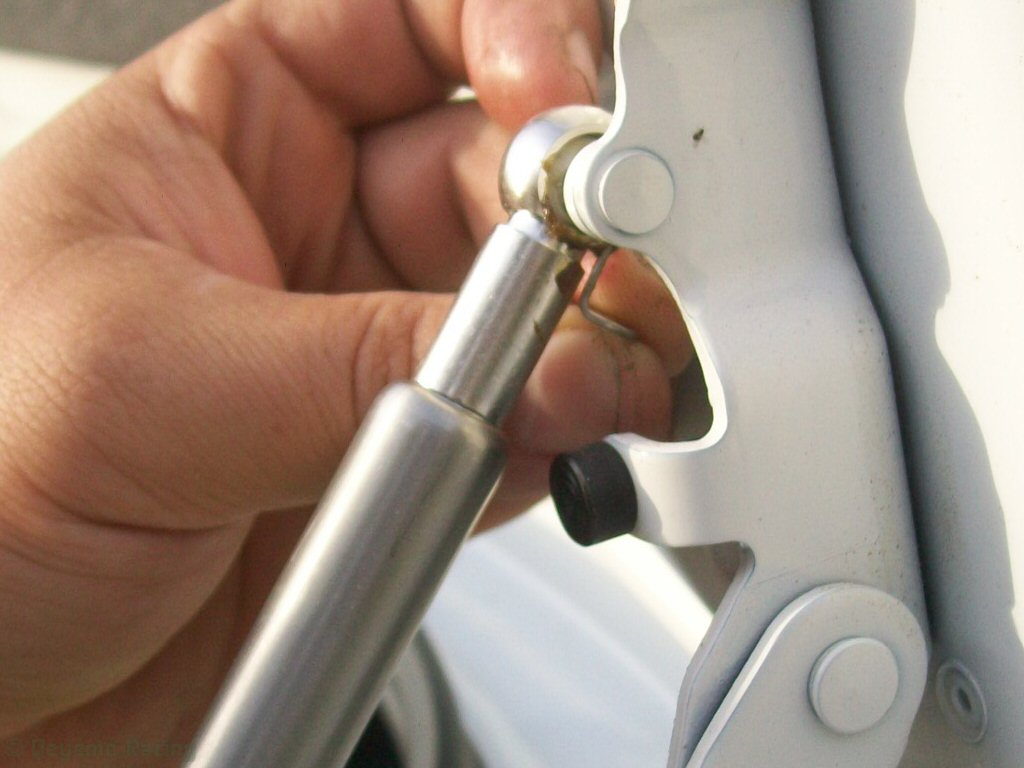
Hood Raise the hood and support it with the prop rod. Attach the M5 screws and well nuts, finger tight, to the lower brackets. Attach end links to springs, and attach ball joints to brackets if not already done. Complete the remainder of these steps for one side; then the other. Remove the forward lower hinge screw. Set the lower bracket in place as shown, with the well nut through the existing hole in the fender. Replace the lower hinge screw through the bracket and hinge, and tighten to 16 ft. lb. Tighten the M5 screw and well nut to about 5 in. lb. Remove forward upper hinge screw. Attach upper bracket loosely over hinge with new M8 button-head screw. While holding hood in place, remove rearward upper hinge screw, swing bracket into place, and replace screw with new supplied screw. Tighten both new hinge screws to 17 ft. lb. Put a small dab of grease on both ball joints. Unfasten the prop rod from the hood and hold the hood up. For springs with nylon end links, push the links firmly onto the ball joints to snap them into place. For stainless steel links, remove the safety pins from the links, snap the links onto the ball joints, then replace the pins. Return the prop rod to the hood, and repeat the steps for the other side. Once finished, the prop rod may be removed. |
      |
||||||
|
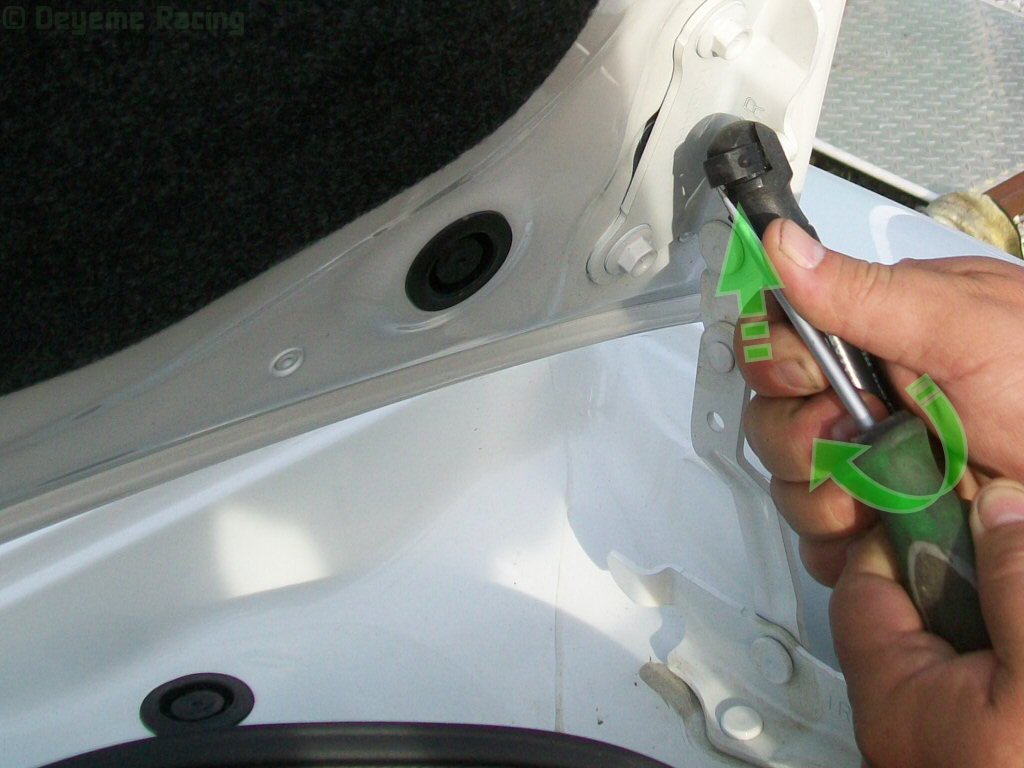
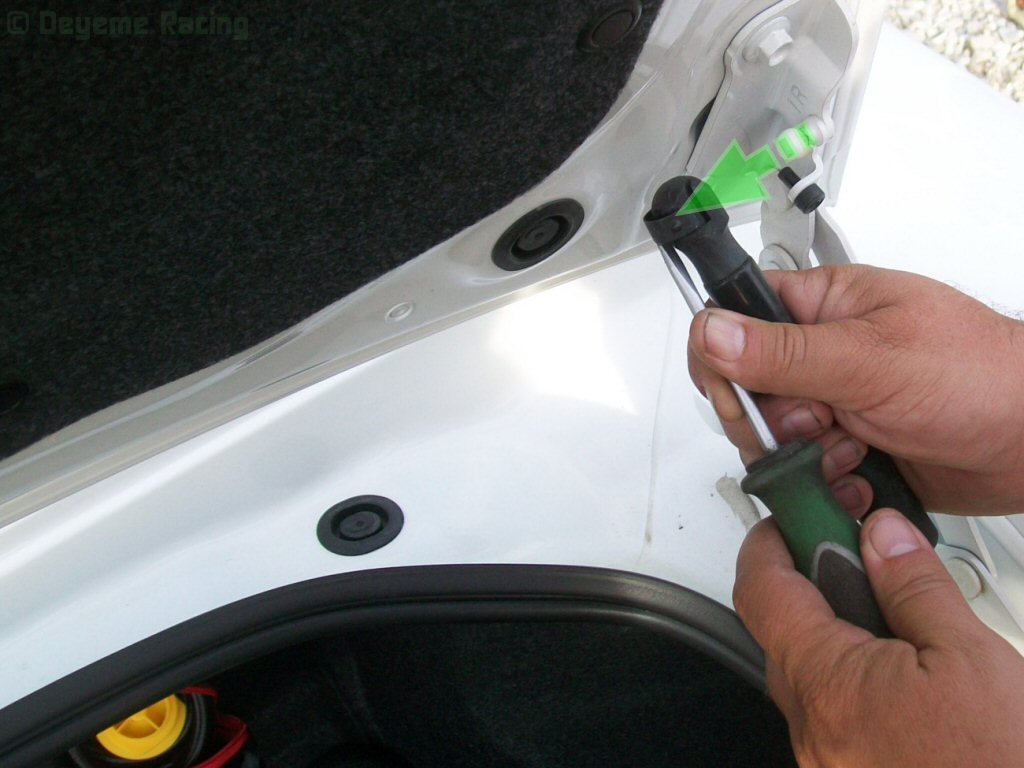
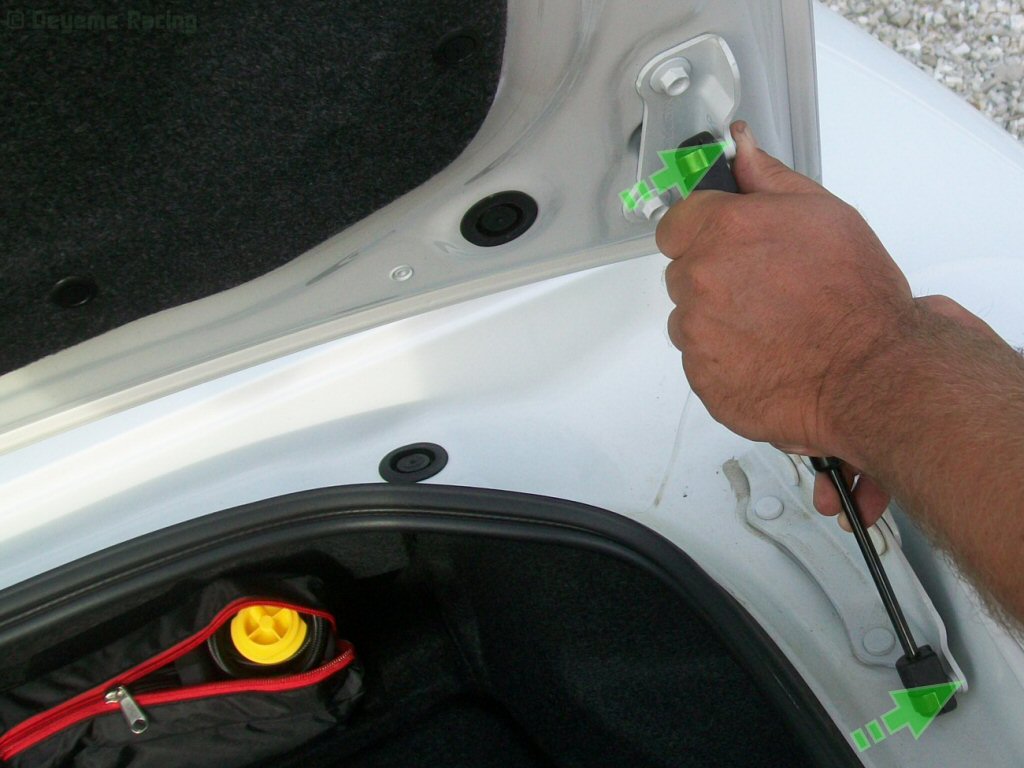
Trunk Attach end links to springs if not already done. You will neeed to hold the weight of the trunk lid once the first spring has been disconnected, and continue to support it until the last end of the new springs is connected. Insert a flat-blade screwdriver under the metal clip on the spring top end link and tilt or rotate it to pull the clip back. Pull the spring away from the ball joint to release it. Repeat for the bottom of the same side, and remove the spring, and set it aside. Place a small dab of grease on both ball joints. Repeat the removal steps for the other original spring, continuing to support the trunk lid. For springs with nylon end links, push the links onto the ball joints to snap them into place. For stainless steel links, remove the safety pins from the links, snap the links onto the ball joints, then replace the pins. Repeat the install steps for the other side, and you're done! |
    |
||||||