
|
The vehicle should be clean and cool.
There should be no unknown issues with related components prior to installation.
Always diagnose problems before jumping to conclusions.
First things first- take inventory. Make sure you have all the tools and components that came with the item you purchased. Last things last- if you have questions or need help with the installation, feel free to contact us via email, at help@deyemeracing.com. Fully explain what you're doing, and your question, including pictures if possible. These instructions are available with high-res images at www.deyemeracing.com/Project_Speedy/PF1FBTRFK_install.htm. |
|
|
Parts Checklist
Tow Hook Base BracketM8 Screws w/ Washers Round Spacers Marking Template |
Required Tools (not included)
metric socket set1/8", 3/8" drill bits 1-1/4" spade bit Flexible (plastic or metal) ruler |
|
Preparation
Take inventory and collect the tools required. Raise the vehicle on a hoist, or lift the front with jack stands or ramps, and secure with wheel chocks and parking brake. |
 
|
|
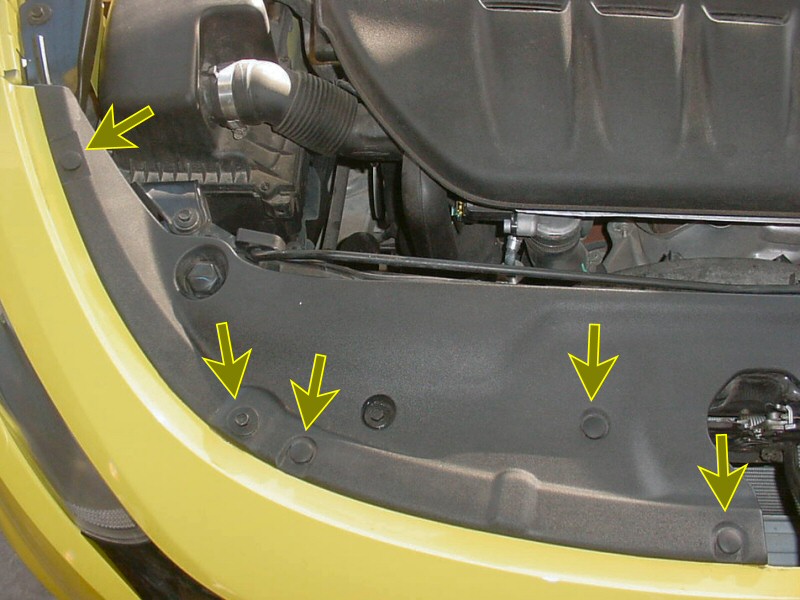
Front Fascia Removal
1) Raise hood to access the upper area of the front fascia. Using a flat-head screwdriver, remove from each side of the upper, four push-pins. Using a 10mm socket, remove from each side of the upper cover, one screw. Remove the upper cover and set aside. 2) Remove four push pins from each side of the fascia upper lip, and then remove the two screws from each side. 3) From underneath, remove the (8) screws holding the fascia onto the closure panel. If applicable, remove the Deyeme Racing front tag bracket and/or Mopar spoiler. In both front wheelwells, remove upper screw (10mm socket) and other three screws (8mm socket) attaching wheelwell panels to fascia. 4) If applicable, unplug AGS (Active Grille Shutters) and fog lamps from their respective sockets. 5) Grasp one of the upper corners of the fascia, and pull firmly away from the body. Repeat for the other side. Grasp the end of the fascia behind the headlamp housing, and pull it firmly away from the body. Repeat for the other side. 6) Gently lift the fascia upper lip off the body, remove it, and set it aside. |
|
|
Tow Hook Base
1) From both sides of the left indent in the bottom of the bumper, as pictured, measure up 45mm (1 3/4"), mark, and connect the marks with a straight line. 2) From the left edge of the bumper, using a flexible ruler, measure 252mm (10"), and make a vertical mark for the center hole. Use the provided template to mark the two side holes. For reference, they are both 40mm up, with the left hole offset to 32mm, and the right hole offset to 24mm. 3) Drill all 3 holes with the 1/8" pilot bit. 4) Drill the center hole with the 1-1/4" spade bit, and drill the side holes to 3/8". 5) Run a wire or coat hanger through the center hole and out the side of the bumper. Hook the base on the wire, and pull the base through to the drilled holes. 6) Holding the bracket in place, attach the 8mm washers and screws. Remove the wire and tighten the screws. 7) Reverse the Front Fascia Removal steps above to replace the fascia. |
        |
|
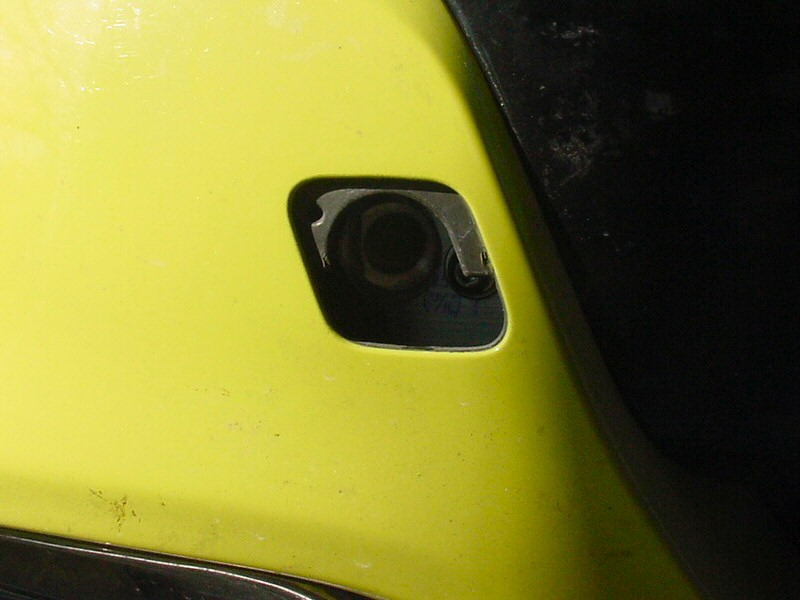
Your installation is now complete! Gently pry the access tab from the fascia, and the threaded hole should be directly behind it. Spacers are included to give a flanged tow loop a seat with the proper depth and angle, if necessary. It is a good idea if installing a tow loop for permanent decorative use, to add a small amount of anti-sieze compound to prevent the tow loop from becoming stuck in the threads. |
  |